You can add new users, and manage existing users, in the Managed Service for TimescaleDB console. New users can be added to an entire project, or a single service.
You can invite new users to join your project as project members. There are several roles available for project members:
| Role | Invite more users | Modify billing information | Manage existing services | Start and stop services | View service information |
|---|---|---|---|---|---|
| Admin | ✅ | ✅ | ✅ | ✅ | ✅ |
| Operator | ❌ | ❌ | ✅ | ✅ | ✅ |
| Developer | ✅ | ❌ | ✅ | ❌ | ✅ |
| Read-only | ❌ | ❌ | ❌ | ❌ | ✅ |
Users who can manage existing services can create databases and connect to them, on a service that already exists. To create a new service, users need the start and stop services permission.
- Sign in to your Managed Service for TimescaleDB portal.
- Check that you are in the project that you want to change the members for,
and click
Members. - In the
Project memberspage, type the email address of the member you want to add, and select a role for the member. - Click
Send invitation. - The new user is sent an email inviting them to the project, and the invite
shows in the
Pending invitationslist. You can clickWithdraw invitationto remove an invitation before it has been accepted. - When they accept the invitation, the user details show in the
Memberslist. You can edit a member role by selecting a new role in the list. You can delete a member by clicking the delete icon in the list.
By default, when you create a new service, a new tsdbadmin user is created.
This is the user that you use to connect to your new service.
The tsdbadmin user is the owner of the database, but is not a superuser. To
access features requiring a superuser, log in as the postgres user instead.
On Managed Service for TimescaleDB services, the tsdbadmin user can:
- Create a database
- Create a role
- Perform replication
- Bypass row level security (RLS)
This allows you to use the tsdbadmin user to create another user with any
other roles. For a complete list of roles available, see the
PostgreSQL role attributes documentation.

Important
Your service must be running before you can manage users.
Sign in to your Managed Service for TimescaleDB portal. By default, you start in the
Servicesview, showing any services you currently have in your project.Click the name of the service that you want to add users to.
Select
Users, then clickAdd service user: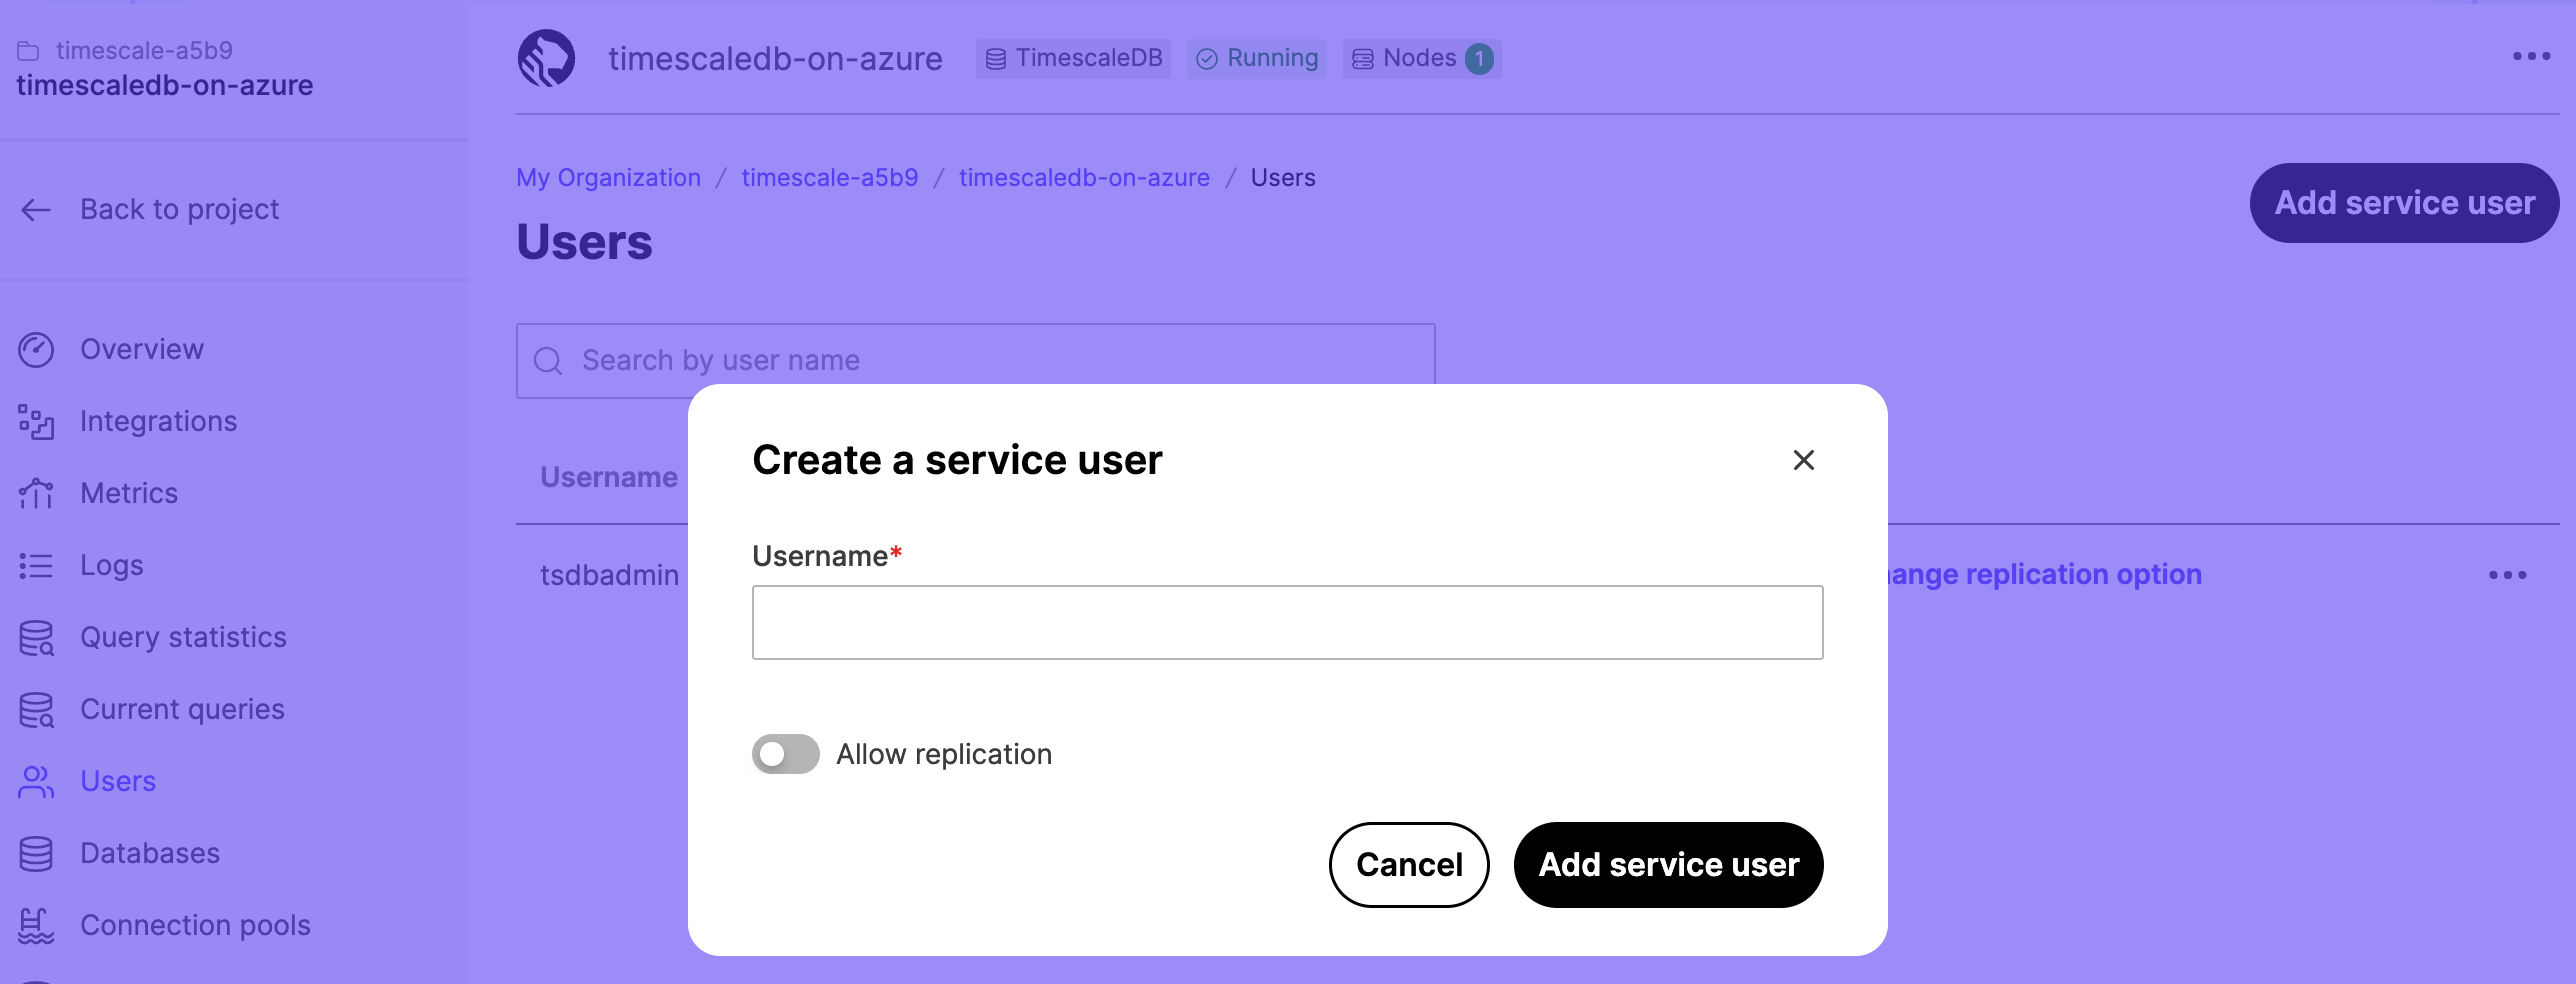
In the
Usernamefield, type a name for your user. If you want to allow the user to be replicated, toggleAllow replication. ClickAdd service userto save the user.The new user shows in the
Usernamelist.To view the password, click the eye icon. Use the options in the list to change the replication setting and password, or delete the user.
You can use multi-factor authentication (MFA) to log in to your Managed Service for TimescaleDB account. This requires an authentication code, provided by the Google Authenticator app on your mobile device.
You can see which authentication method is in use by each member of your Managed
Service for TimescaleDB project. From the dashboard, navigate to the Members
section. Each member is listed in the table with an authentication method of
either Password or Two-Factor.
Before you begin, install the Google Authenticator app on your mobile device. For more information, and installation instructions, see the Google Authenticator documentation.
- Sign in to your Managed Service for TimescaleDB portal.
- Click the
User informationicon in the top-right of the dashboard to go to theUser profilesection. - In the
Authenticationtab, toggleTwo-factor authenticationtoEnabled, and enter your password. - On your mobile device, open the Google Authenticator app, tap
+and selectScan a QR code. - On your mobile device, scan the QR code provided by Managed Service for TimescaleDB.
- In your Managed Service for TimescaleDB dashboard, enter the confirmation
code provided by the Google Authenticator app, and click
Enable Two-Factor Auth.

Warning
If you lose access to the mobile device you use for multi-factor authentication, you cannot sign in to your Managed Service for TimescaleDB account. To regain access to your account, on the login screen, click Forgot password? and follow the step to reset your password. When you have regained access to your account, reconfigure multi-factor authentication.
Every time a registered user logs in, Managed Service for TimescaleDB creates a new authentication token. This occurs for login events using the portal, and using the API. By default, authentication tokens expire after 30 days, but the expiry date is adjusted every time the token is used. This means that tokens can be used indefinitely, if the user logs in at least every 30 days.
You can see the list of all current authentication tokens in the Managed Service
for TimescaleDB dashboard. Sign in to your account, and click the
User information icon in the top-right of the dashboard to go to the
User profile section. In the Authentication tab, the table lists all current
authentication tokens.
When you make authentication changes, such as enabling two factor authentication
or resetting a password, all existing tokens are revoked. In some cases, a new
token is immediately created so that the web console session remains valid. You
can also manually revoke authentication tokens from the User profile page
individually, or click Revoke all tokens to revoke all current tokens.
Additionally, you can click Generate token to create a new token. When you
generate a token on this page, you can provide a description, maximum age, and
an extension policy. Generating authentication tokens in this way allows you to
use them with monitoring applications that make automatic API calls to Managed
Service for TimescaleDB.
Important
There is a limit to how many valid authentication tokens are allowed per user. This limit is different for tokens that are created as a result of a sign in operation, and for tokens created explicitly. For automatically created tokens, the system automatically deletes the oldest tokens as new ones are created. For explicitly created tokens, older tokens are not deleted unless they expire or are manually revoked. This can result in explicitly created tokens that stop working, even though they haven't expired or been revoked. To avoid this, make sure you sign out at the end of every user session, instead of just discarding your authentication token. This is especially important for automation tools that automatically sign in.
Keywords
Found an issue on this page?Report an issue or Edit this page in GitHub.