This document provides a step-by-step guide to migrating a database from an AWS RDS Postgres instance to Timescale using our live migration strategy to achieve low application downtime (on the order of minutes).
Live migration's replication mechanism is fundamentally based on Postgres' logical decoding feature. However, for the purpose of this guide, an in-depth understanding of logical decoding is not necessary.

Note
In the context of migrations, your existing production database is referred to as the "source" database, while the new Timescale database that you intend to migrate your data to is referred to as the "target" database.
Before you start the migration process, you will need to:
- Gather information about your RDS instance.
- Prepare your RDS instance for Live migration.
- Prepare an intermediate machine.
You will need the following information about your Postgres RDS instance:
- Endpoint
- Port
- Master username
- Master password
- VPC
- DB instance parameter group
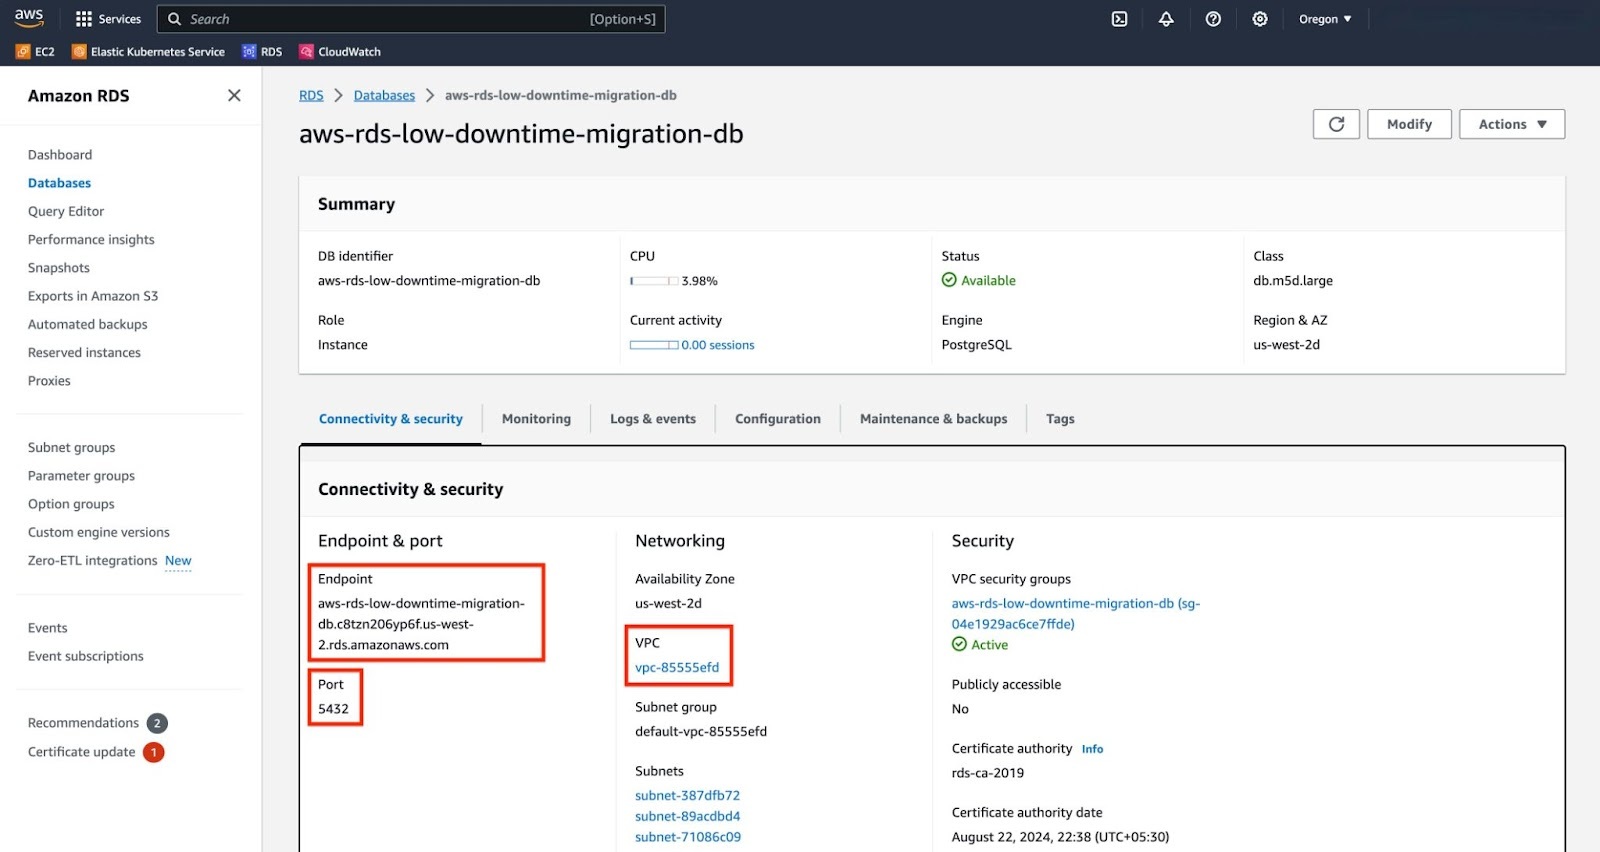
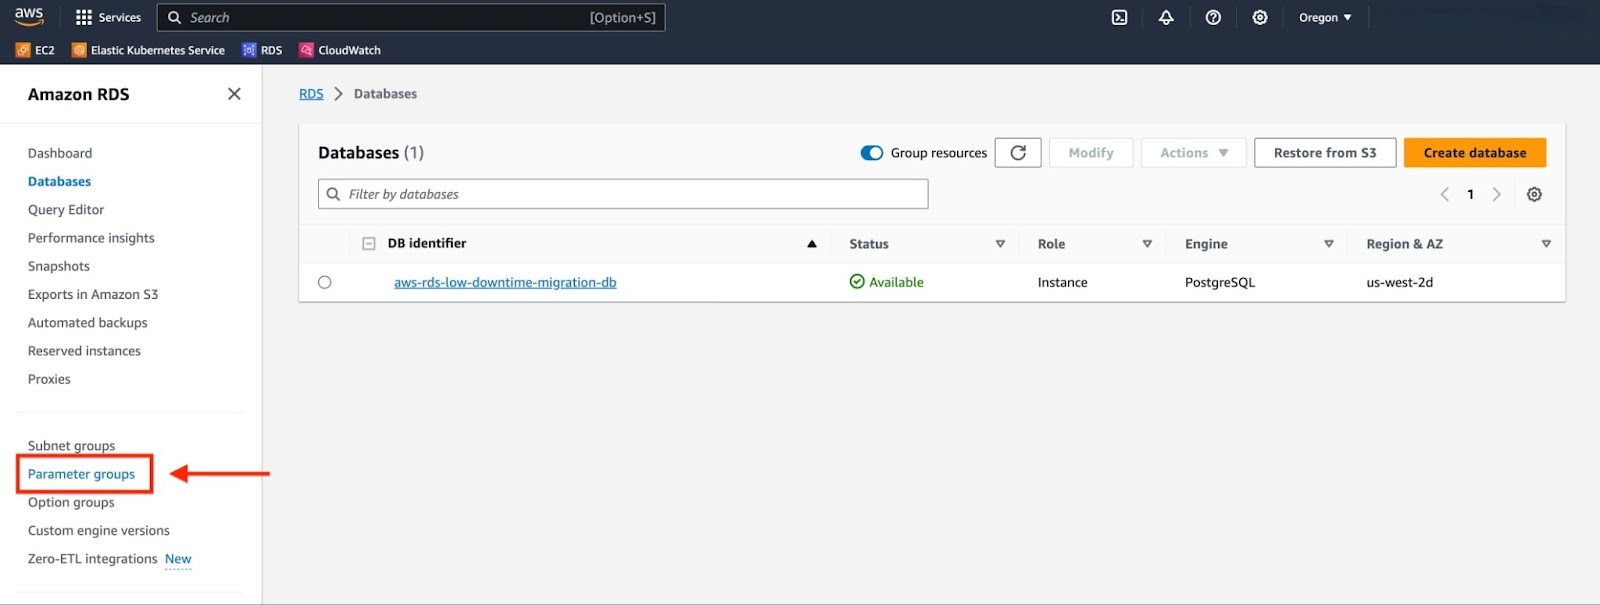
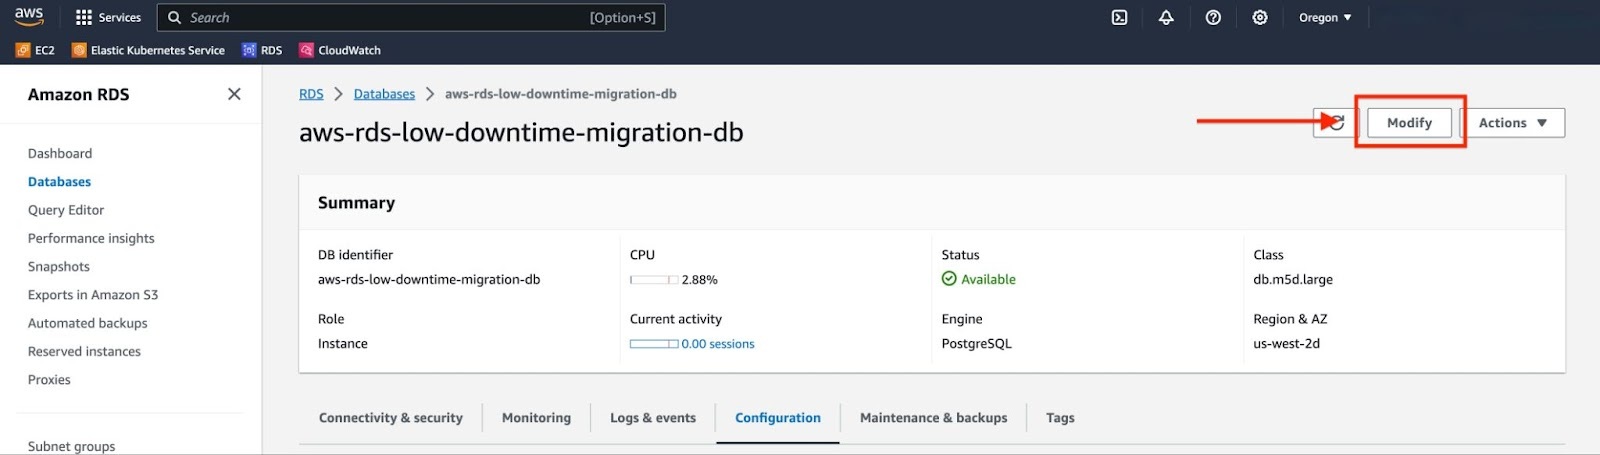
To gather the required information, navigate to the "Databases" panel and select your RDS instance.
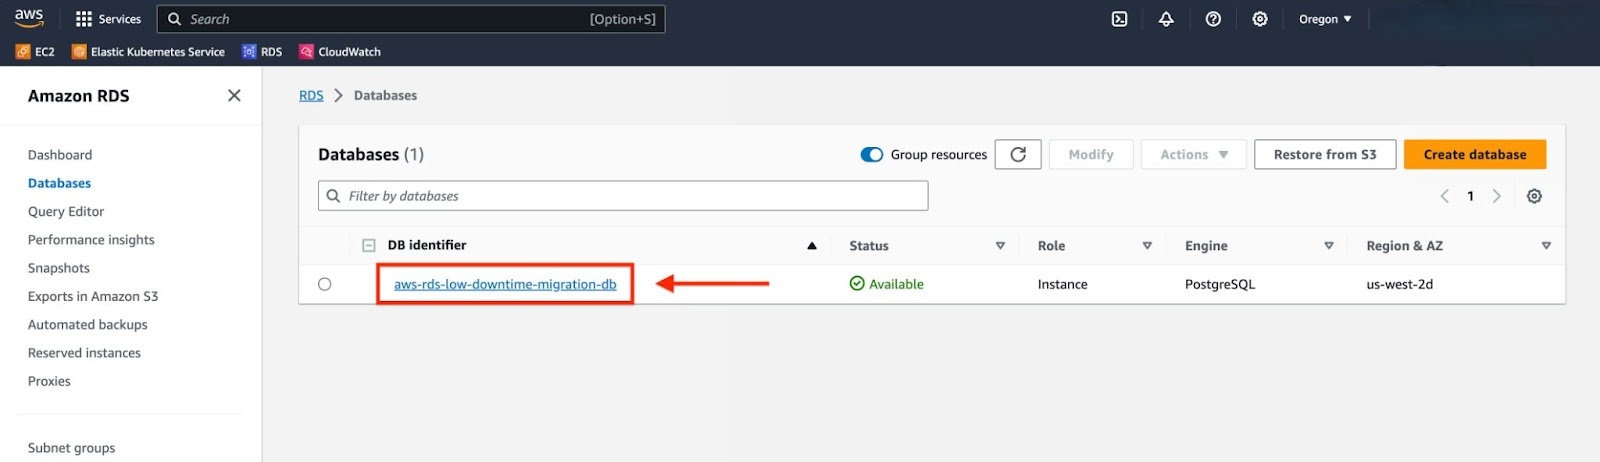
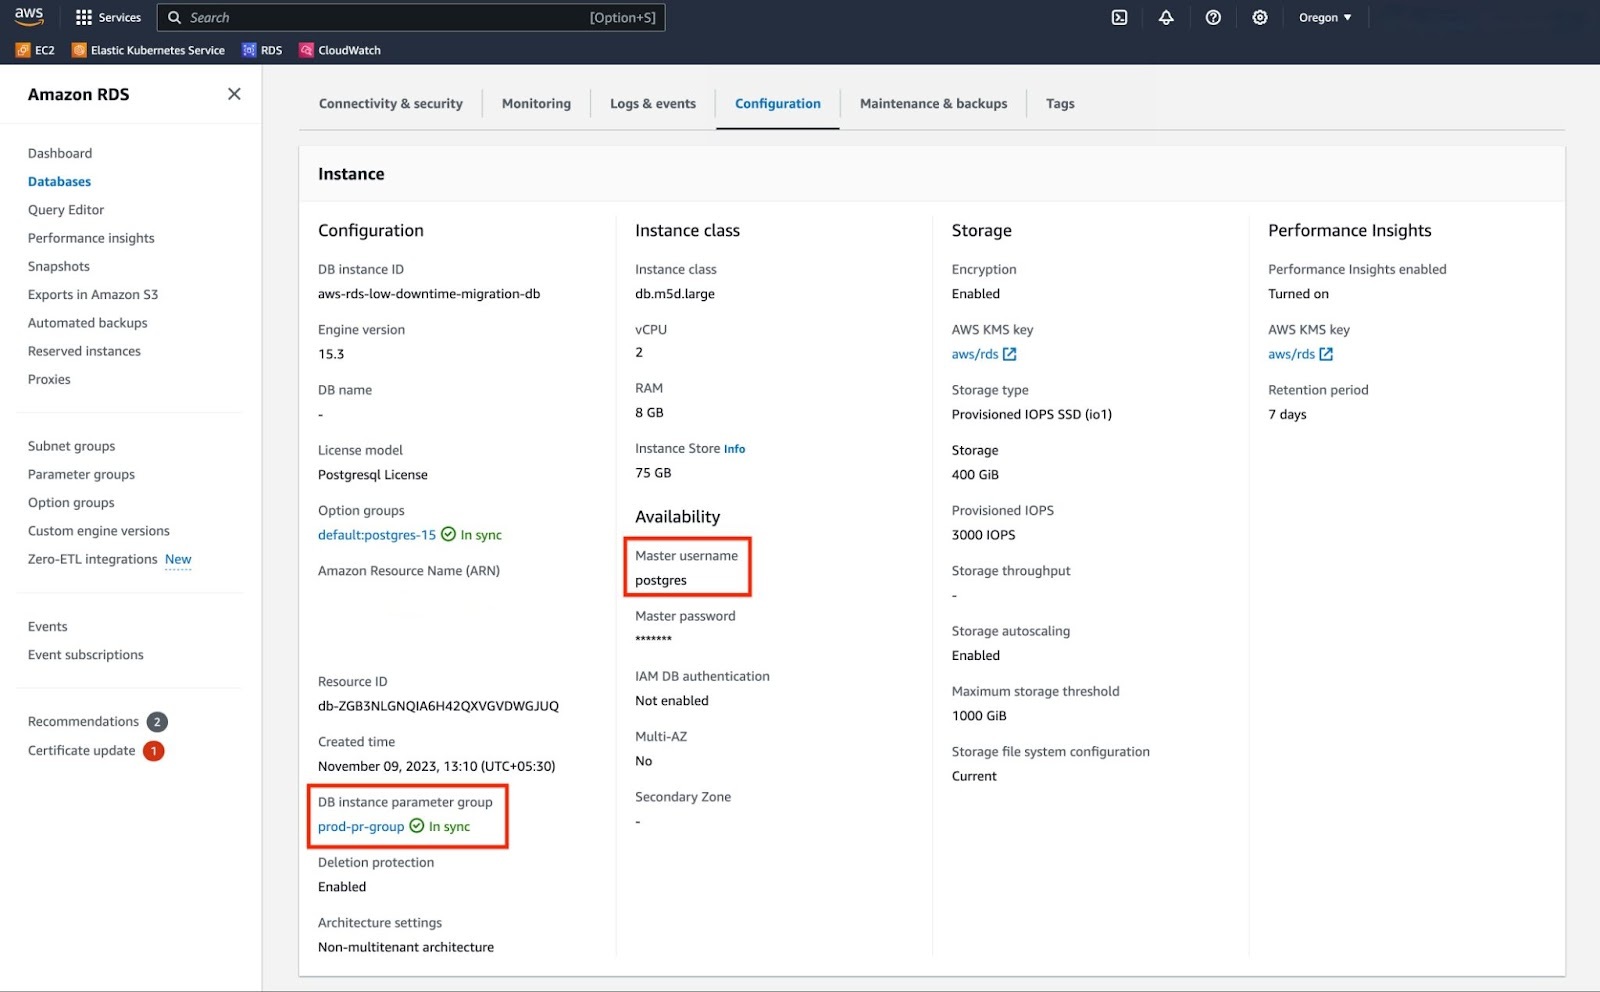
Note the Endpoint, Port, and VPC details from the "Connectivity & Security" tab, and the Master Username, and DB instance parameter group from the "Configuration" tab. Remember to use the Master Password that was supplied when the Postgres RDS instance was created.
To use your RDS instance as the source database for a Live migration, and to ensure the replication process runs smoothly, set the following configuration parameters:
| Configuration | Required Values |
|---|---|
| wal_level | logical |
| old_snapshot_threshold | -1 |
You can check the value of above configuration parameters
postgres=> show wal_level;wal_level-----------minimal(1 row)postgres=> show old_snapshot_threshold;old_snapshot_threshold------------------------0(1 row)
If the values returned do not match the ones required (as in this situation), you will have to adjust them.

Important
Modifying either of these parameters requires restarting PostgreSQL, which will cause your database to be briefly unavailable. Ensure that you make the following configuration changes when you're comfortable with a database restart.
For users to make modifications, RDS requires the creation of a parameter group with the desired configuration values.
A "DB parameter group" can be thought of as a set of key-value pairs that serve as the configuration settings for the database. To find the current DB parameter group that your RDS instance is using, go to the "Configuration" tab of your RDS service and look for the value listed under "DB instance parameter group".
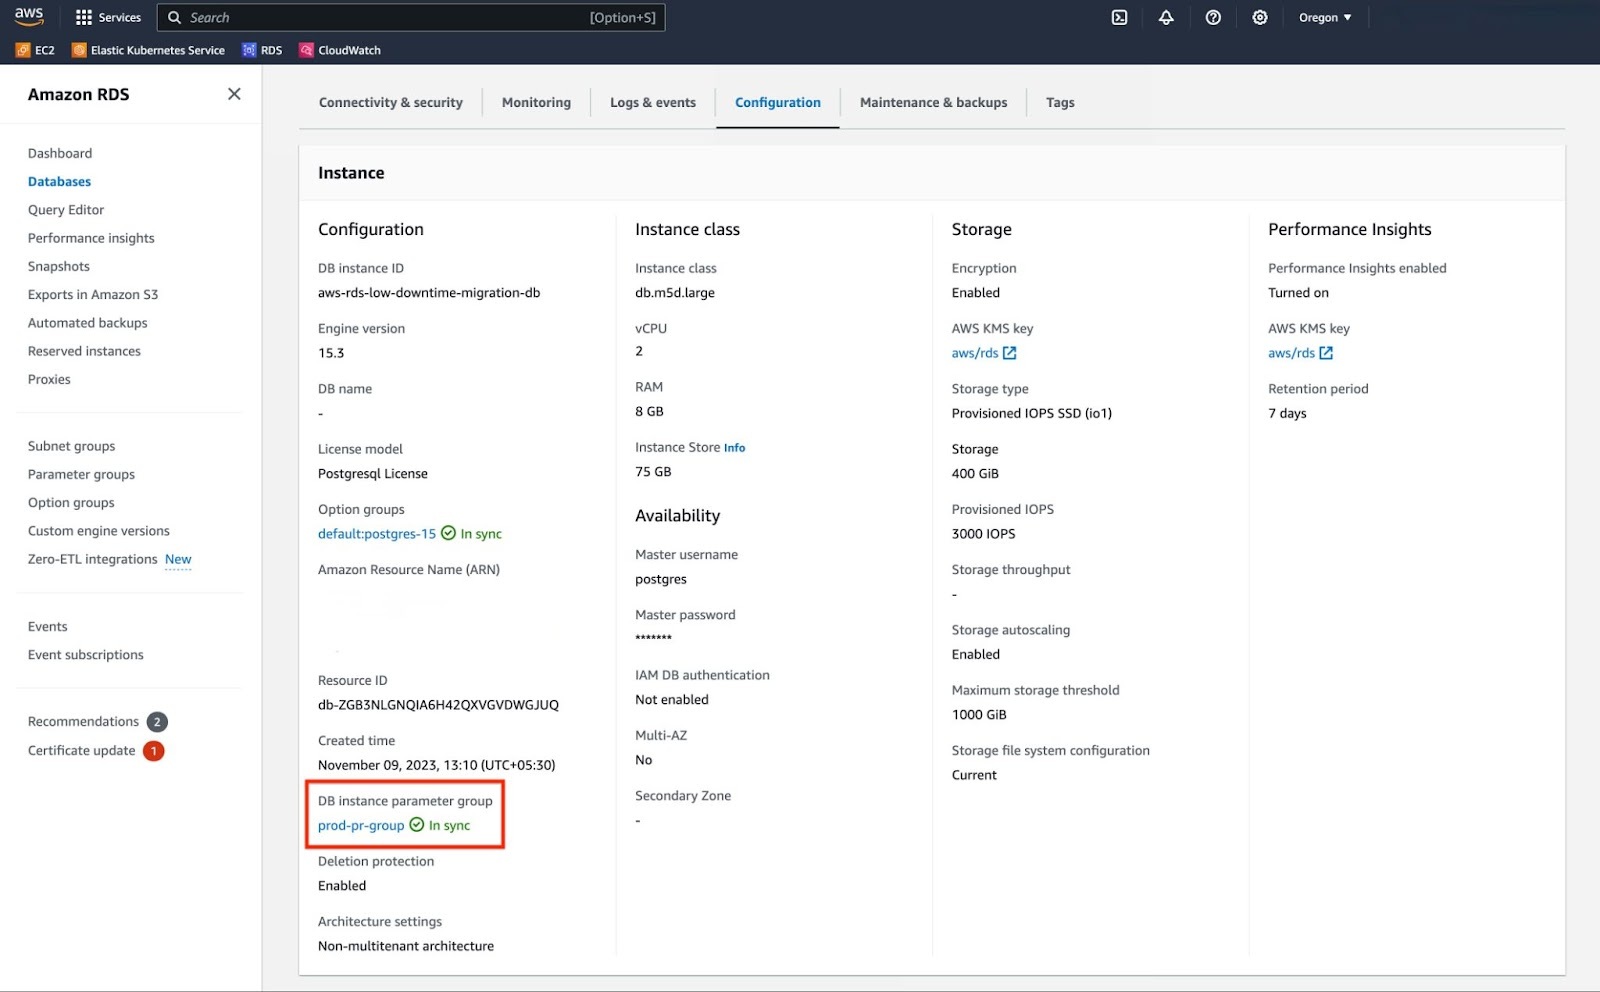
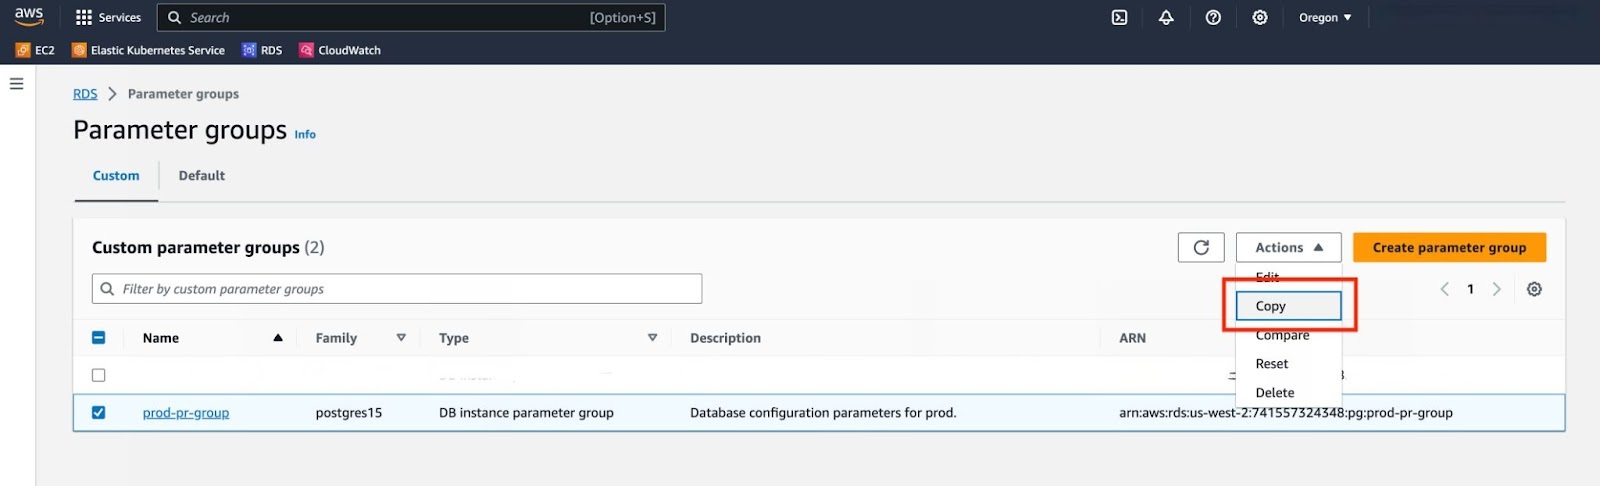
Let’s create a DB parameter group that modifies the values for "wal_level" and "old_snapshot_threshold" fields. We will base this group on the existing "prod-pr-group" so that we can maintain the other fields as they are while only changing the ones we need.
Important
If your AWS RDS service is a Multi-AZ DB Cluster deployment, then you will need to use "DB Cluster Parameter Group" instead of "DB Parameter Group".
Navigate to the "Parameter groups" panel using the sidebar.
Copy the parameter group that is active in your RDS instance.
Important
If the "DB parameter group" of your RDS instance displays "default.postgres15", you need to create a new DB parameter group. To do this, select "Create parameter group" and opt for "postgres15" in the "Parameter group family" field.
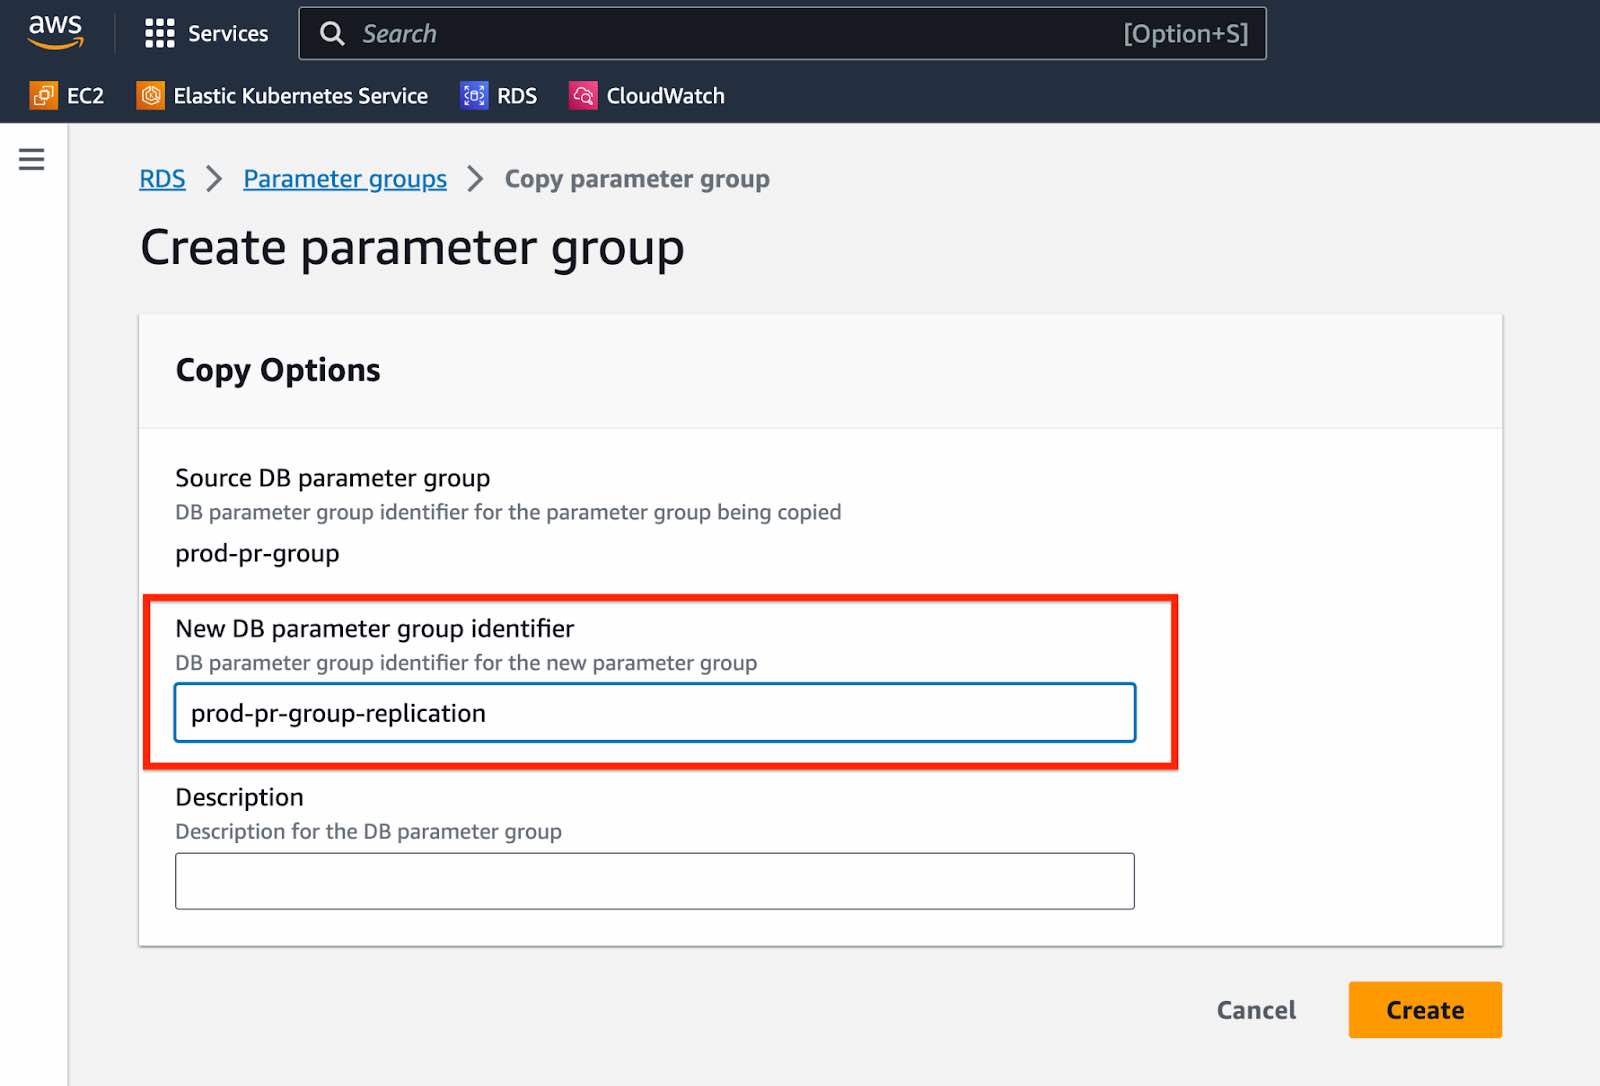
Rename the parameter group, provide a description and click on "Create".
- You will find the new parameter group in the "Parameter group" panel. Open the newly created
parameter group by clicking on it.

Click on "Edit".

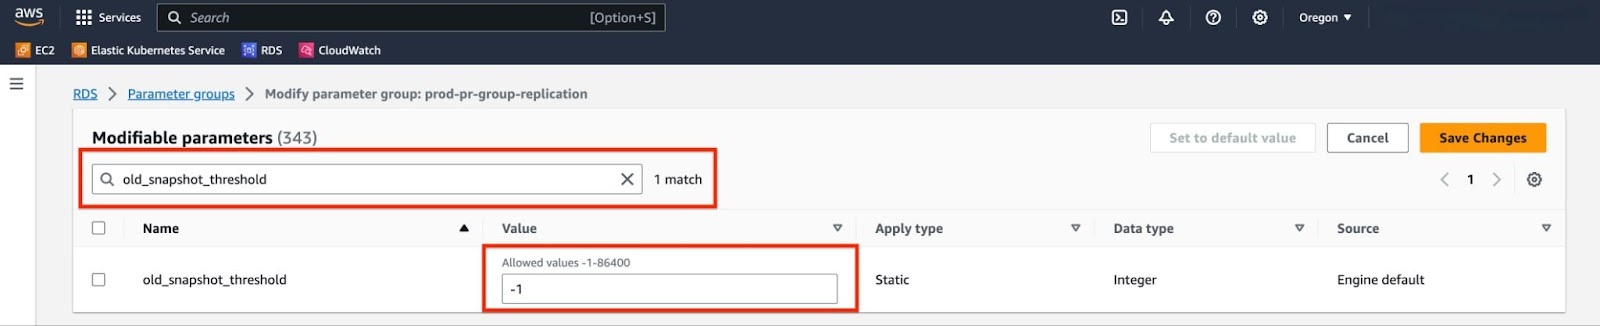
Locate "rds.logical_replication" using the search box and adjust its value from 0 to 1. Next, locate "old_snapshot_threshold" and set its value to -1. Once you’ve made these changes, remember to click on "Save Changes".

Navigate back to your RDS instance and click on "Modify".
Navigate to the "Additional configuration" section and change the "DB parameter group" value to the new DB parameter group that includes the updated parameter values. After making this change, click "Continue" located at the bottom of the page.

Once you have verified the new parameter group value, select "Apply immediately" and click on "Modify DB Instance".

Important
Configuring the new parameter group will not cause your database to be restarted. In the next step you will manually reboot the database.
Your RDS service will be in the "Modifying" state for a short while, after which, you should see that the parameter group is in the "Pending reboot" state and must be rebooted to be applied.

Manually reboot your service in order to apply the changes. In the "Actions" dropdown, click "Reboot" and then "Confirm".
After your service reboots, ensure that the new "DB parameter group" is applied in your RDS instance.

Reconnect to your RDS instance and verify the configuration parameter values.
postgres=> show wal_level;wal_level-----------logical(1 row)postgres=> show old_snapshot_threshold ;old_snapshot_threshold-------------------------1(1 row)
Live Migration must be executed from a dedicated machine. The live migration tools connect to the source and target databases, and all data will flow through the dedicated machine between the source and the target. This instance must be able to access your RDS service and ideally is in the same region as your Timescale instance. We will set up an EC2 instance in the same VPC as the RDS service.
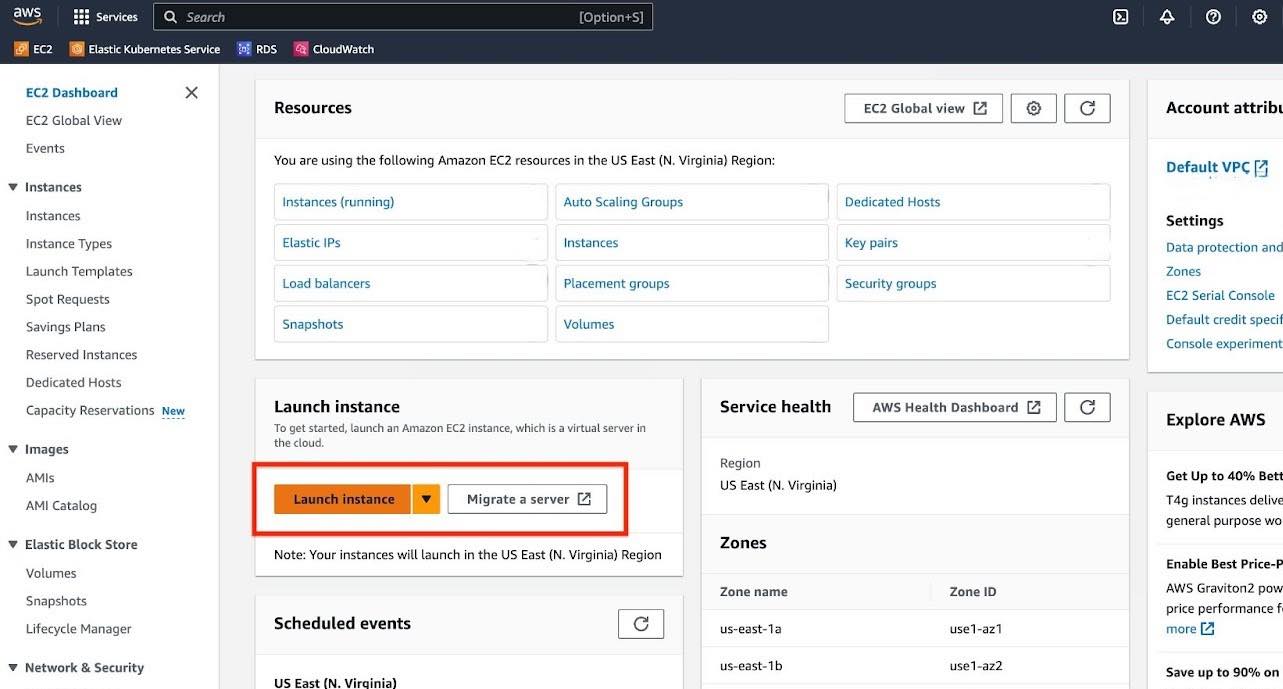
In the AWS search, type "EC2" and select the "EC2" option under services.

Click on "Launch instance".
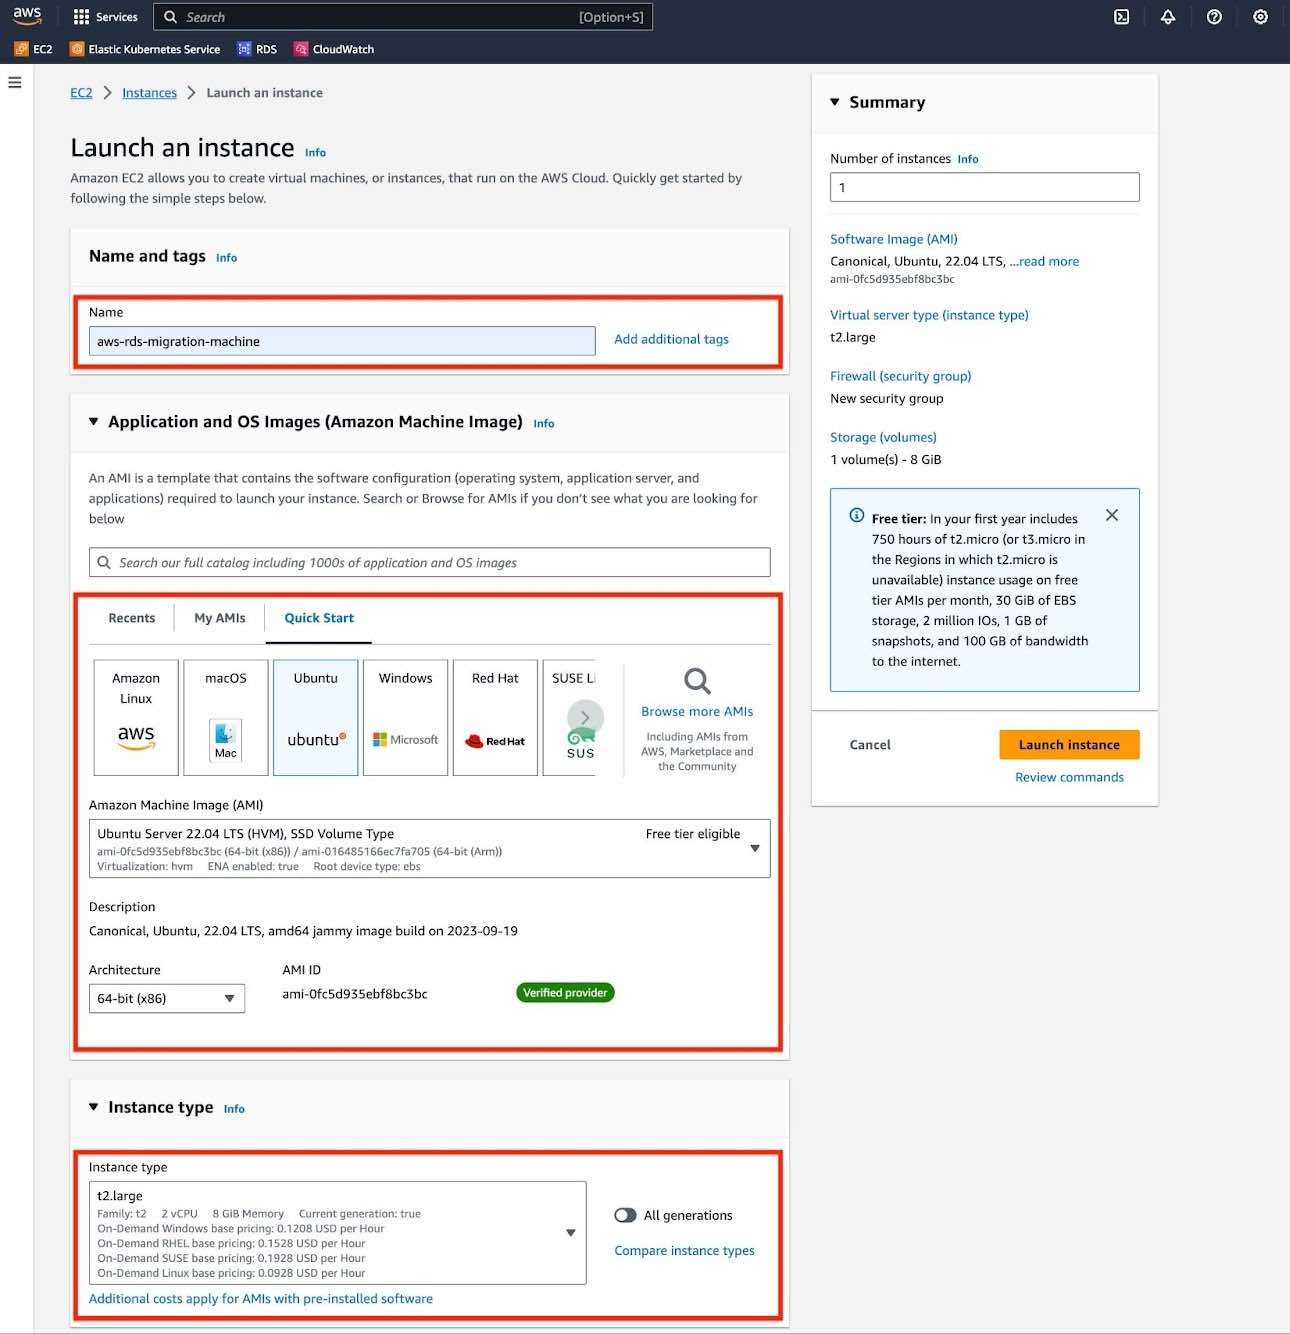
Configure your EC2 instance.
a. For "Application and OS image", choose Ubuntu Server LTS.
b. For "Instance type", use 2 CPU and 8 GB memory at least. If your migration involves a larger database, you should choose accordingly.
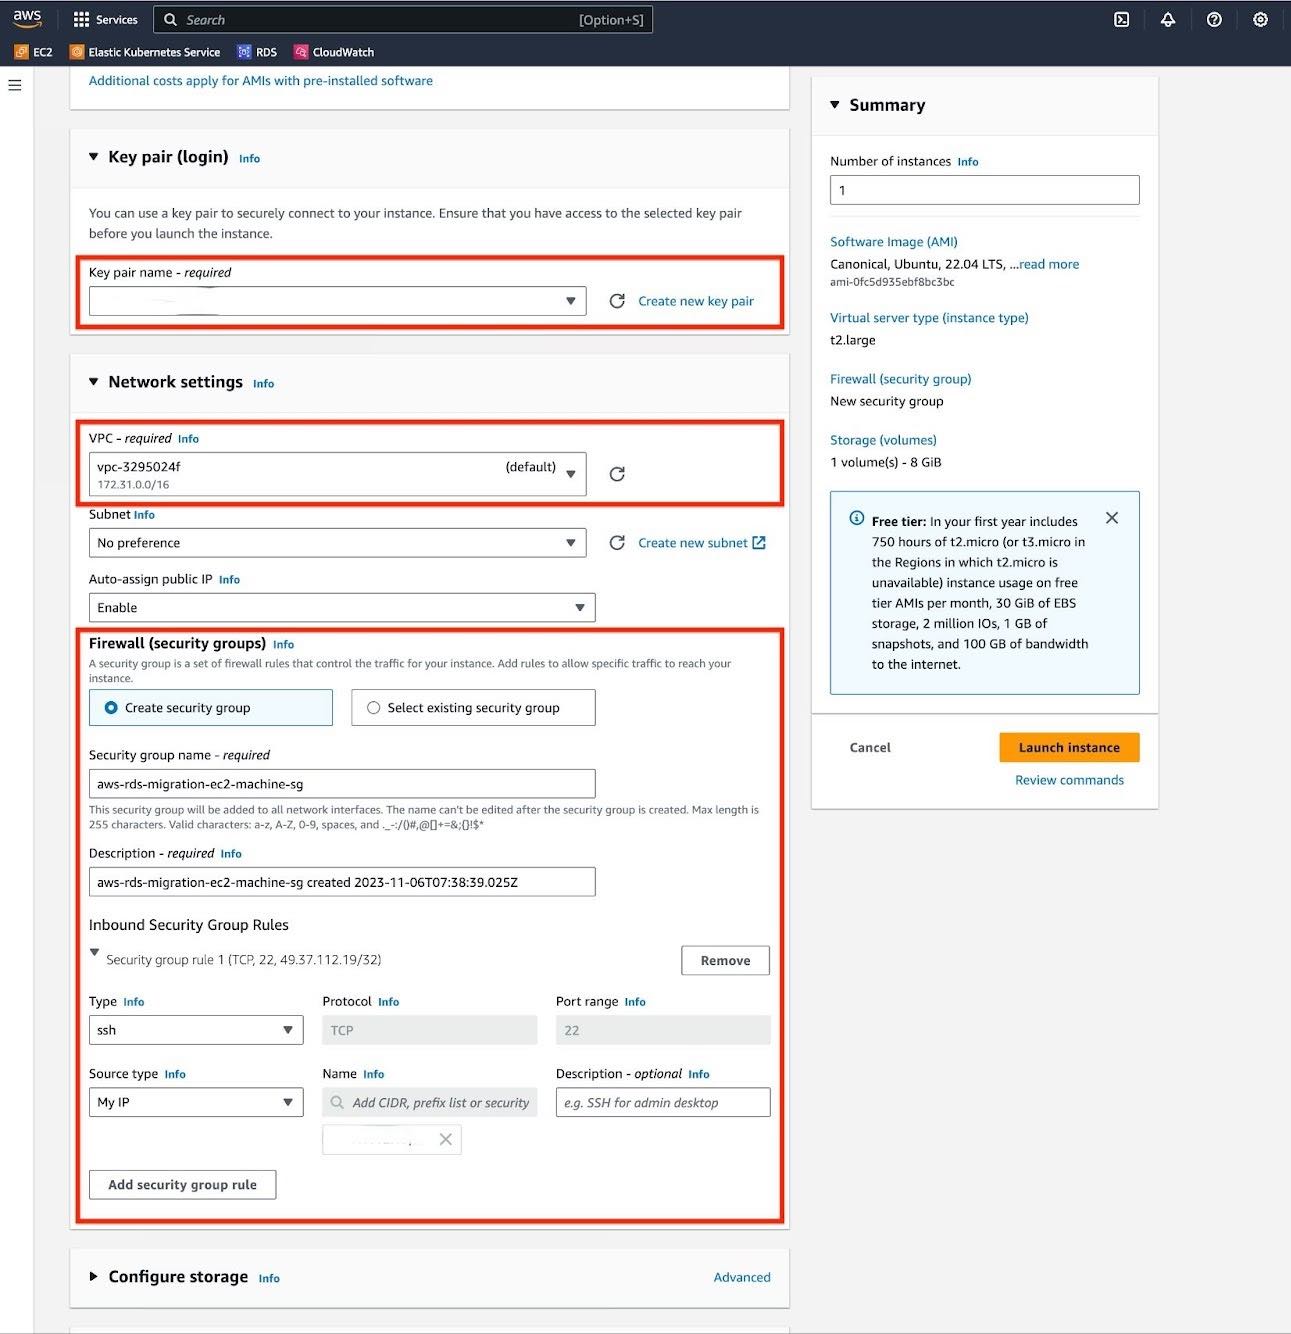
c. For "Key pair", you can choose to use an existing key pair or create a new one. This will be necessary when connecting to the EC2 instance from your local machine.
d. For "Network Settings", select the same VPC that your RDS instance is located in. Also, modify the "Source Type" of the security group to "My IP" so that your local machine can connect to the EC2 instance.
e. For "Configure Storage" section, adjust the volume size to match the 1.5x the size of your database. If necessary, you should enable encryption on your volume.
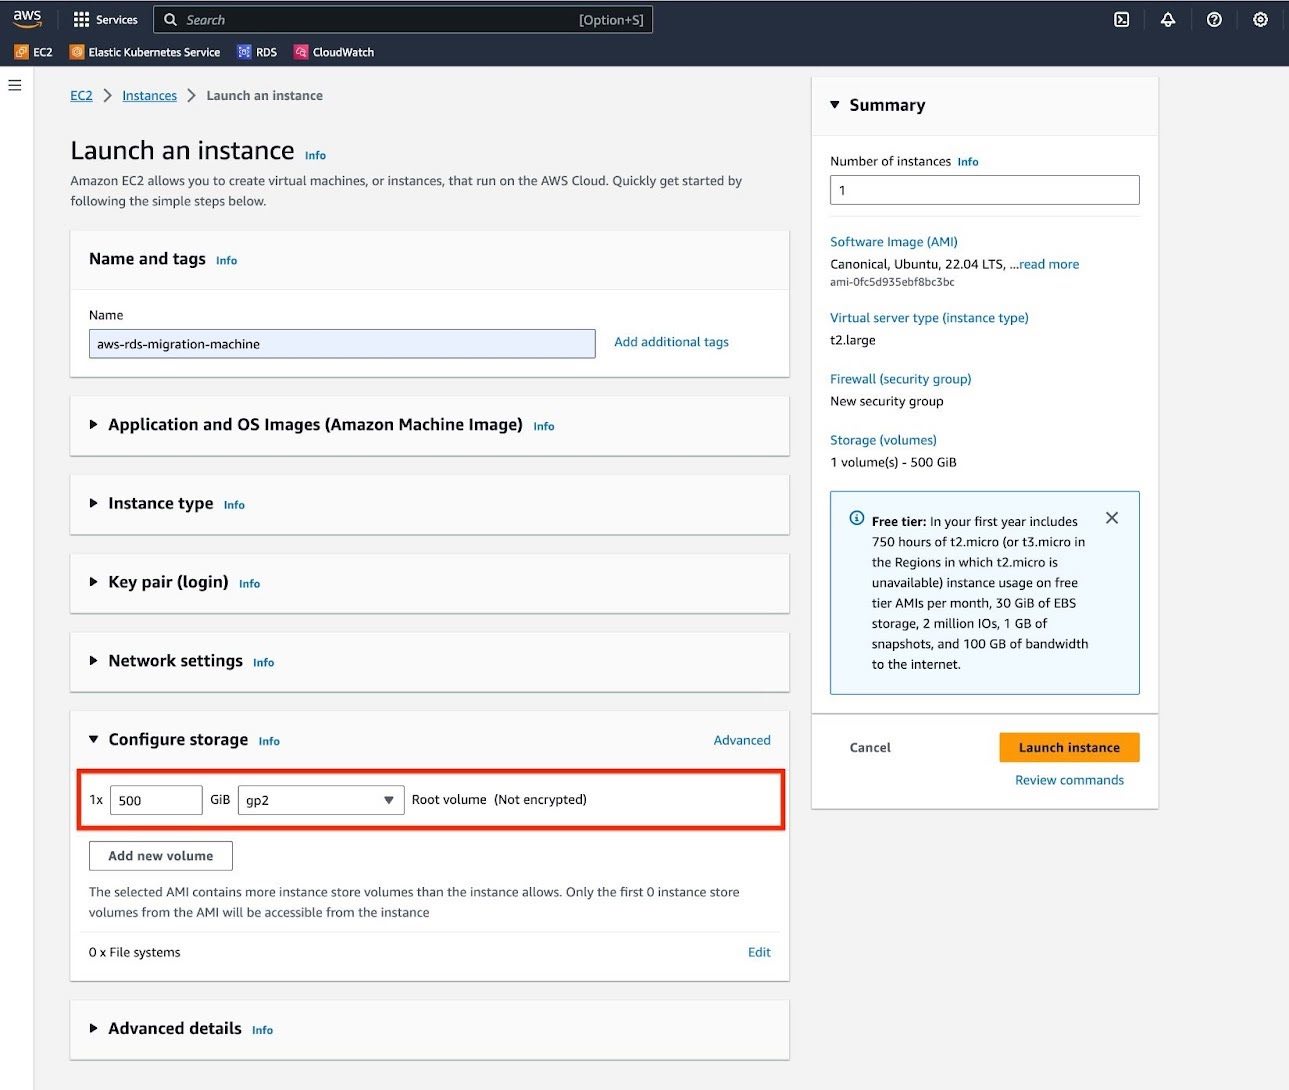
Review the summary of the instance and click "Launch instance".

To prepare your EC2 instance for a low-downtime migration:
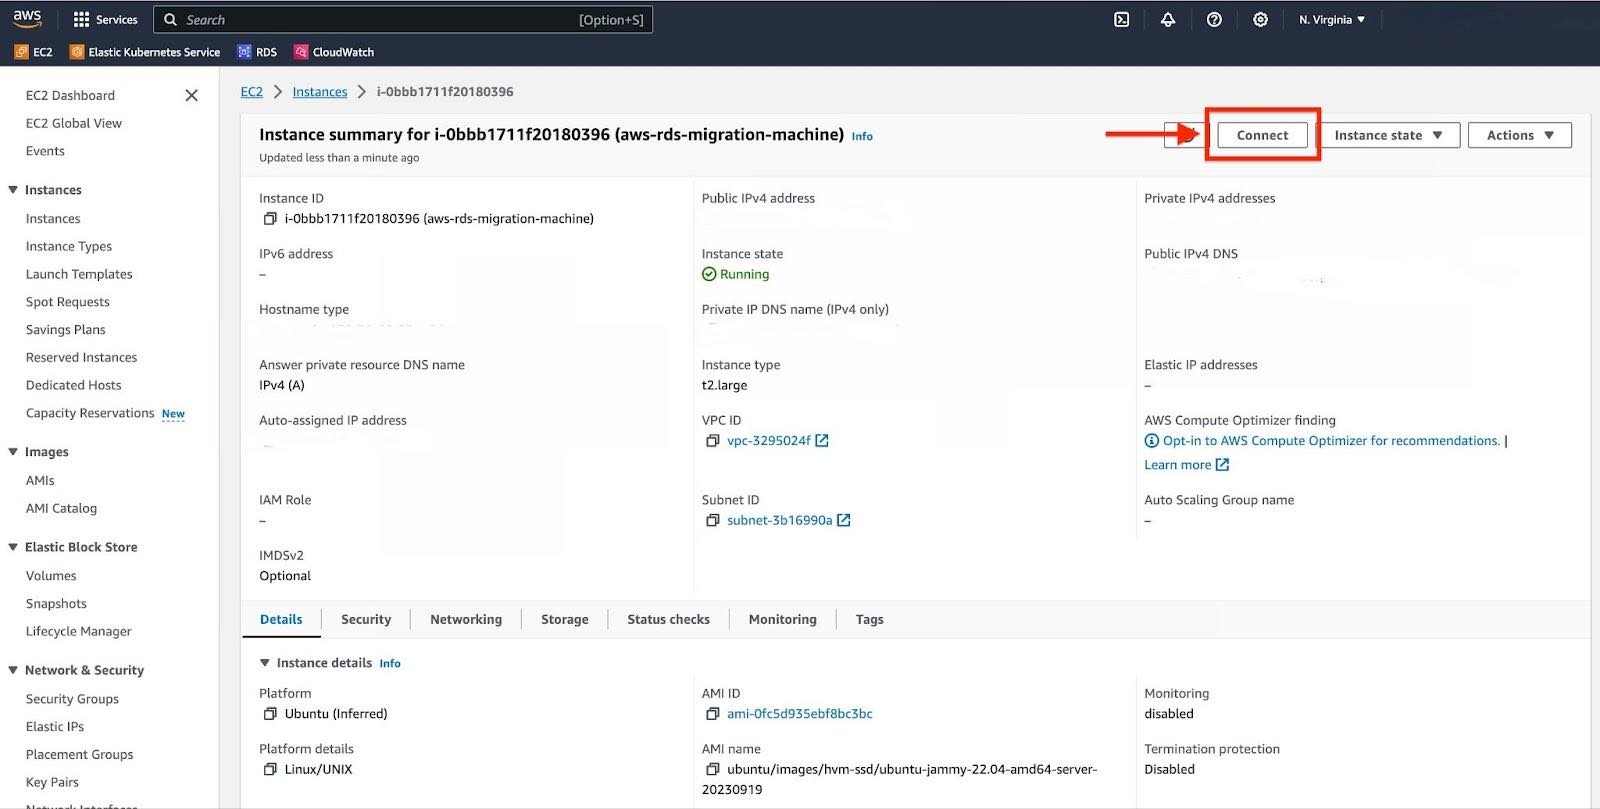
Navigate to your EC2 instance and click on "Connect".
Select the "SSH client" tab.
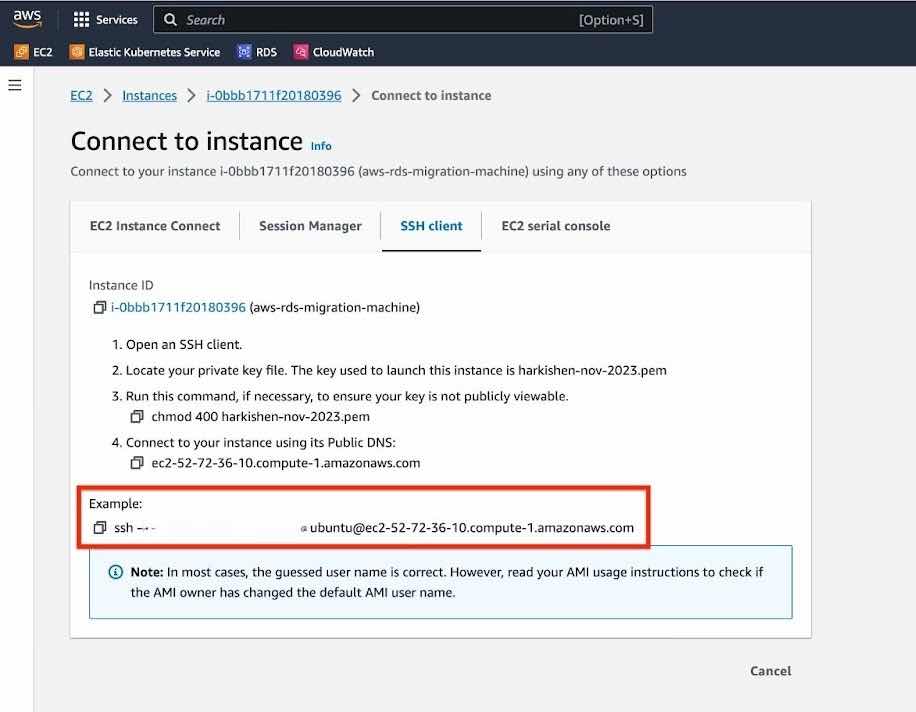
Connect to your EC2 instance using the "Key pair" you received while creating the EC2 instance.
chmod 400 <key-pair>.pemssh -i "<key-pair>.pem" ubuntu@<EC2 instance's Public IPv4>
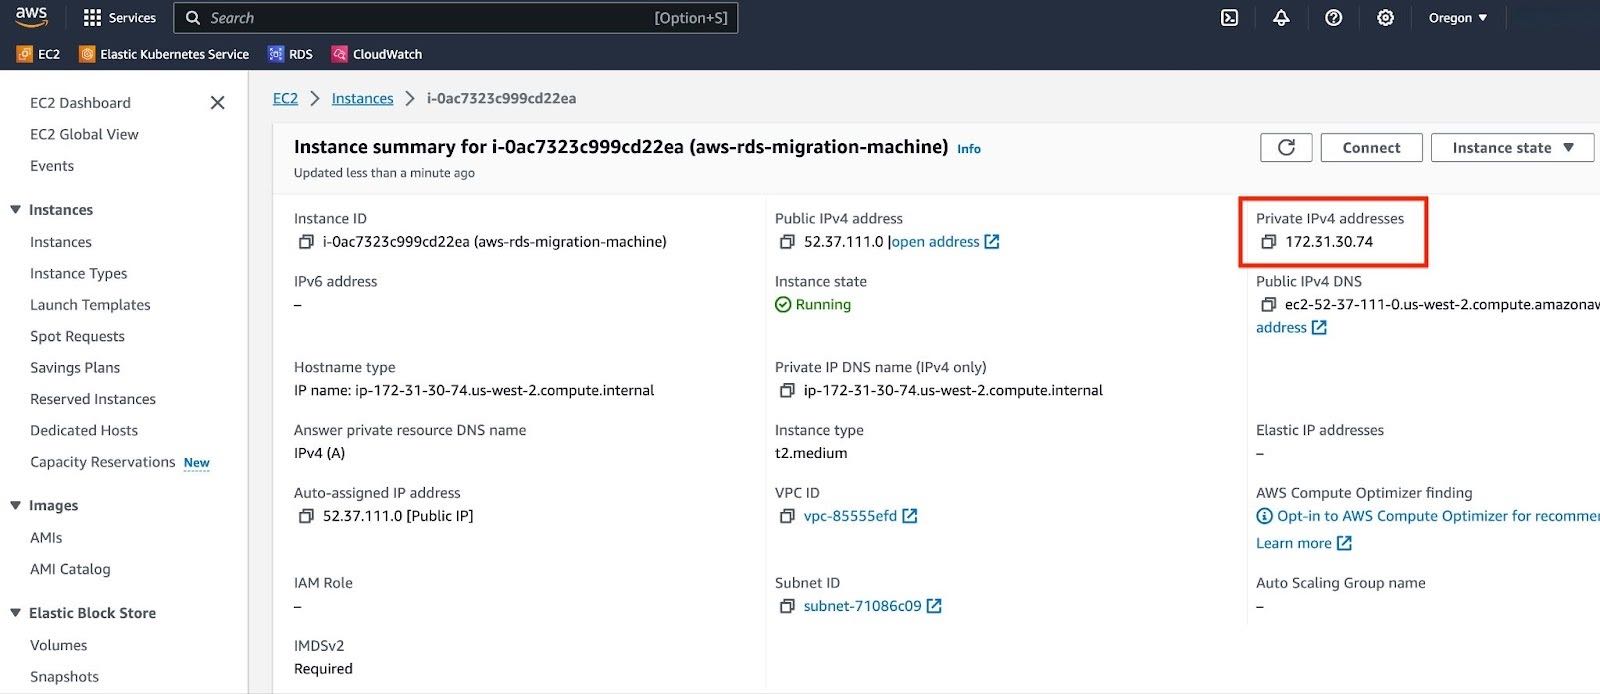
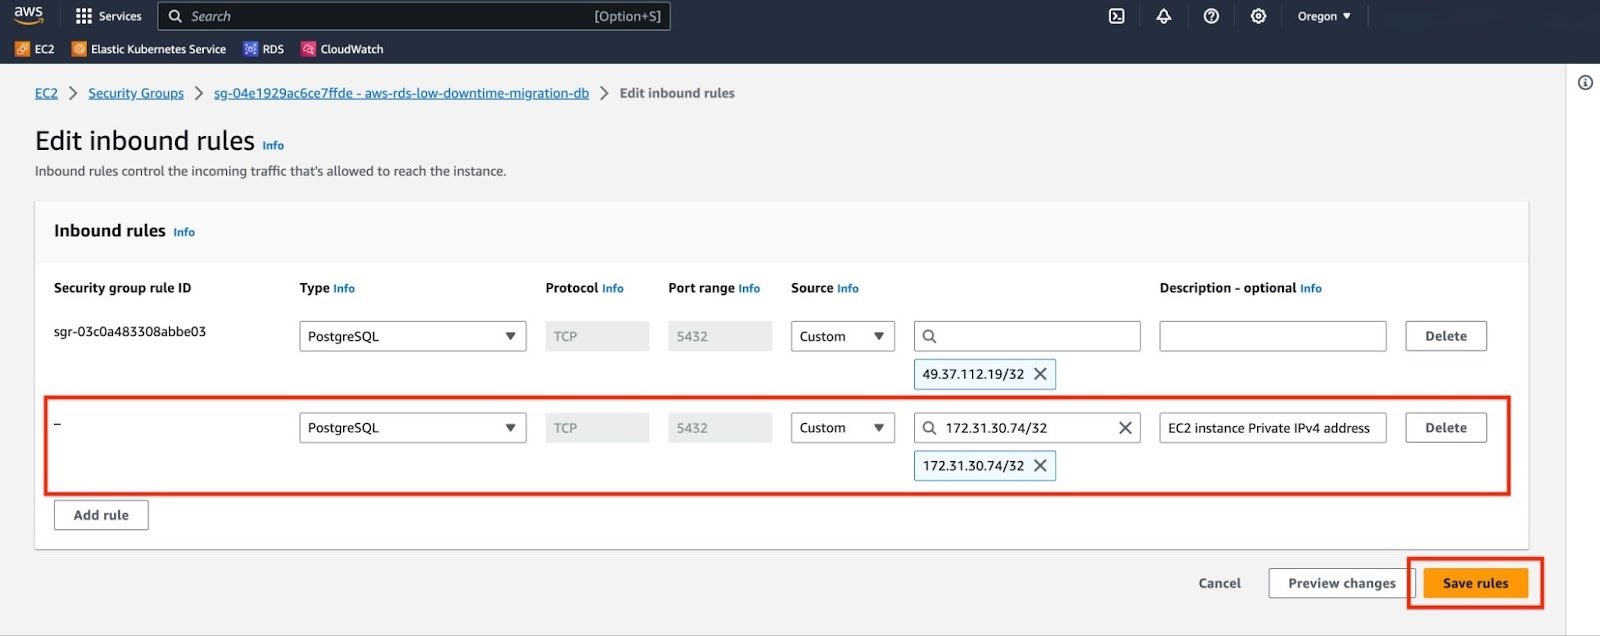
To allow an EC2 instance to connect to an RDS instance, you need to modify the security group associated with your RDS instance.
a. Note the Private IPv4 address of your EC2 instance.
b. Go to the security group associated with your RDS instance and select "Edit inbound rules".

c. Click "Add rule". In the "Type" field, select "PostgreSQL". For "Source", select "Custom" and input the Private IPv4 address of your EC2 instance. Add a suitable description for this rule. Finally, click on "Save rules" to apply the changes.
Verify the connection to the RDS service from your EC2 instance. Please note, you will be prompted to enter the master password. This should be the same password that you used when creating your AWS RDS service.
# psql -h <rds_endpoint> -p <rds_port> -U postgres -c "select 1"psql -h aws-rds-low-downtime-migration-db.c8tzn206yp6f.us-west-2.rds.amazonaws.com -p 5432 -U postgres -c "select 1"Password for user postgres:?column?----------1(1 row)

Tip
If you get stuck, you can get help by either opening a support request, or take
your issue to the #migration channel in the community slack,
where the developers of this migration method are there to help.
You can open a support request directly from the Timescale console, or by email to [email protected].
The remaining steps for migrating data from a RDS Postgres instance to Timescale with low-downtime are the same as the ones mentioned in "Live migration" documentation from Step 1 onwards. You should follow the mentioned steps to successfully complete the migration process.
Keywords
Found an issue on this page?
Report an issue!